Are you interested in growing your own potatoes but don’t have a lot of space or gardening experience?
Well, I’ve got the perfect solution for you – growing potatoes in a cardboard box! It’s easy, convenient, and doesn’t require a lot of effort.
In this blog post, I’ll guide you through the simple steps to easily grow potatoes in a cardboard box.
Why Grow Potatoes in a Cardboard Box?
Before we get into the details of how to grow potatoes in a cardboard box, let’s talk about why this method is so great. First of all, growing potatoes in a cardboard box is perfect for people with limited space. Whether you have a small backyard, a balcony, or even just a sunny spot indoors, you can easily set up a potato box and start growing your own potatoes.
Secondly, this method is incredibly low-maintenance. You don’t need any fancy gardening equipment or tools – just a cardboard box, some soil, and potato seeds. It’s a great way for beginners to dip their toes into gardening without feeling overwhelmed.
Lastly, growing potatoes in a cardboard box is also a sustainable option. Instead of using plastic pots or containers, you can repurpose old cardboard boxes and give them a new life as a planter. Plus, when the potato growing season is over, you can simply recycle the cardboard box – no need to worry about storing bulky pots for next year.
What You’ll Need:
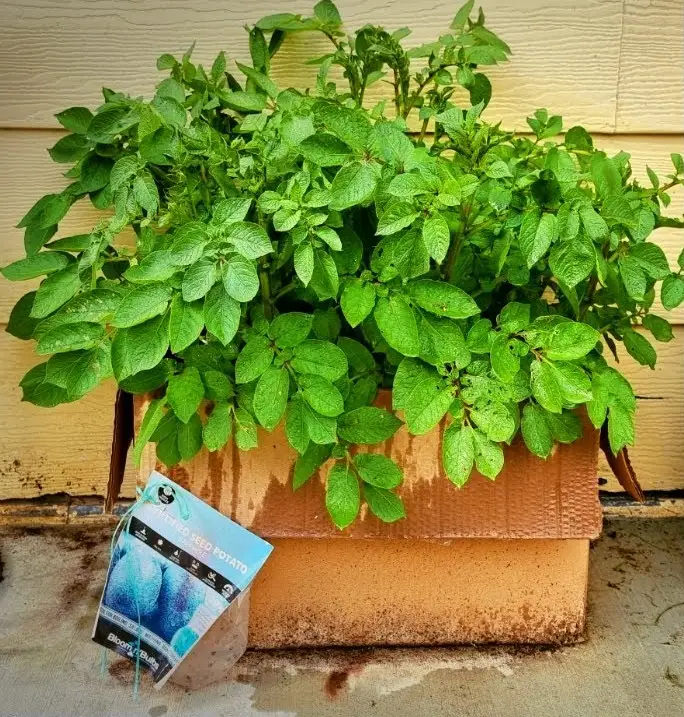
- A large cardboard box: You can use any sturdy cardboard box, such as an old shipping box or moving box. Make sure it’s at least 18 inches deep to allow room for the potatoes to grow.
- Potting soil: Look for a high-quality potting mix that is well-draining and rich in organic matter. Avoid using garden soil, as it may contain pests or diseases that could harm your potatoes.
- Seed potatoes: You can purchase seed potatoes from a garden center or online. Look for certified disease-free seed potatoes to ensure a healthy crop.
- A sunny spot: Potatoes thrive in full sun, so choose a location that receives at least 6-8 hours of sunlight per day.
Step 1: Prepare the Cardboard Box
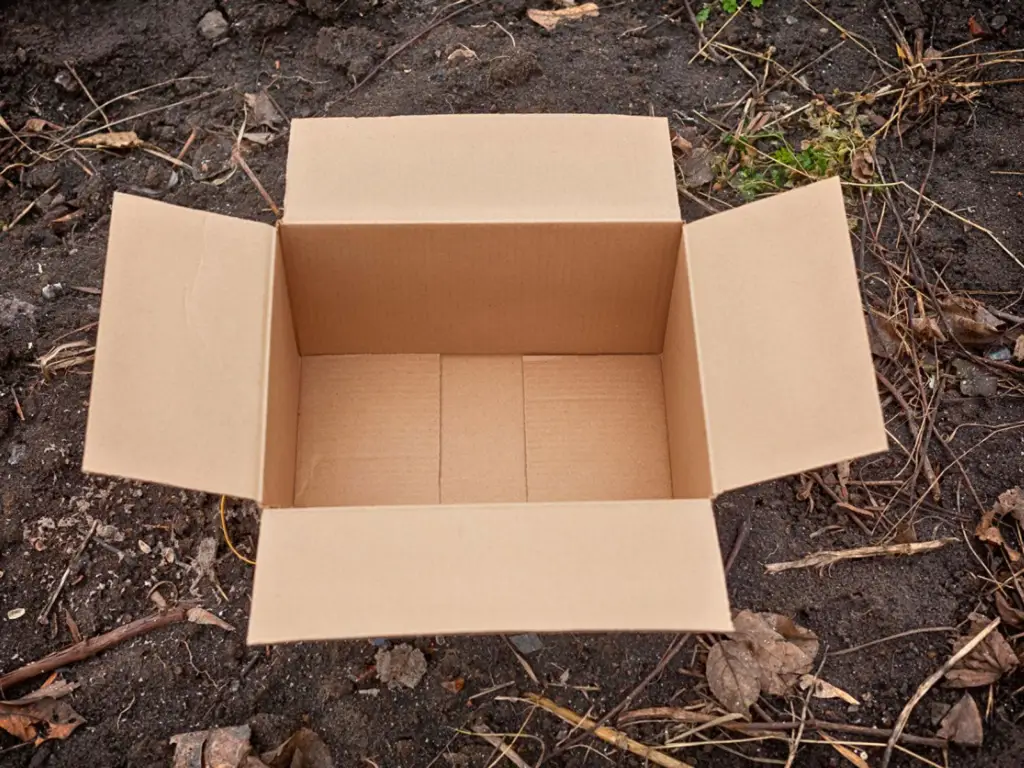
Start by preparing the cardboard box for planting. If the box has a lid, remove it and set it aside – you won’t need it for this project. Use a pair of scissors or a utility knife to cut off the top flaps of the box, leaving about 6 inches of height all around. This will create a shallow planter that allows the potato plants to receive ample sunlight.
Next, use a skewer or small nail to poke several drainage holes in the bottom of the box. Good drainage is crucial for growing healthy potatoes, so be sure to make enough holes to allow excess water to escape.
Step 2: Plant the Seed Potatoes

Fill the bottom of the cardboard box with 4-6 inches of potting soil. Place the seed potatoes on top of the soil, spacing them evenly and leaving about 6 inches of space between each potato. Then, cover the seed potatoes with another 4-6 inches of potting soil, making sure they are completely buried.
As the potato plants grow, you can continue adding more soil to the box to cover the stems. This encourages the plants to produce more tubers and prevents the exposed potatoes from turning green.
Step 3: Water and Care for Your Potato Plants
Once your potatoes are planted, it’s time to give them some tender loving care. Water the potato box thoroughly after planting to settle the soil and ensure good contact with the seed potatoes. Throughout the growing season, keep the soil consistently moist but not waterlogged. Avoid overwatering, as this can lead to rot and disease.
As the potato plants grow, they may need some support to prevent them from sprawling outwards. You can use stakes or even more cardboard boxes to create a “tower” and contain the plants as they grow taller.
Step 4: Managing Pests and Diseases
Keep an eye out for common potato pests such as potato beetles and aphids, and remove them by hand or use natural predators like ladybugs to control infestations. To prevent diseases such as late blight and potato scab, avoid overhead watering and practice crop rotation.
Step 5: Harvest Your Potatoes
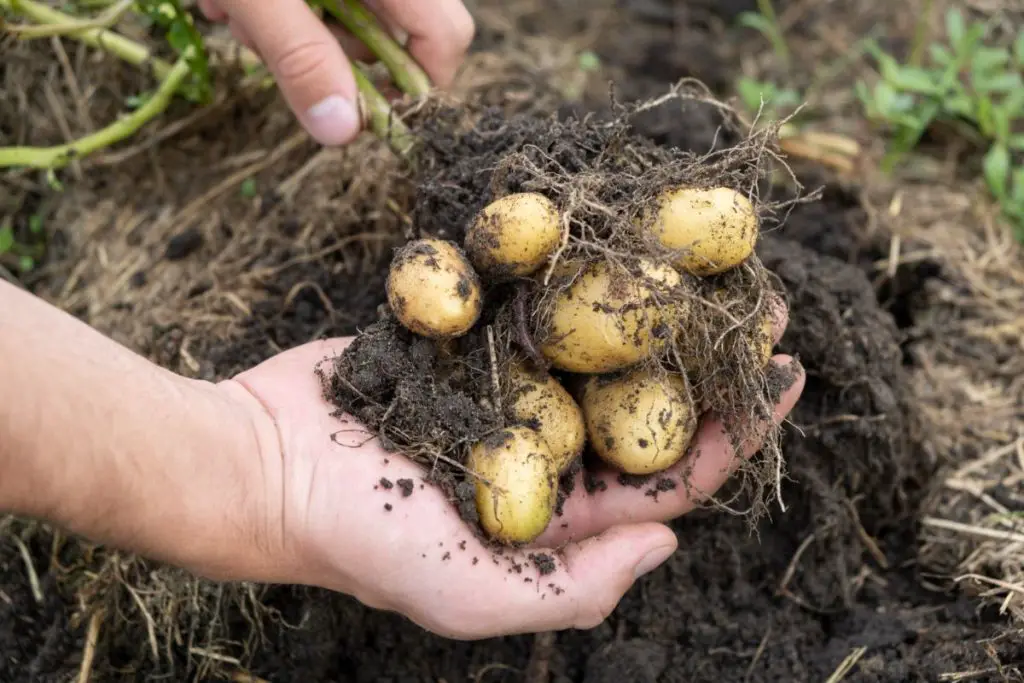
In about 10-12 weeks, your potato plants will start to flower, indicating that it’s time to harvest your crop. Carefully reach into the soil and feel around for mature potatoes – they should be about the size of an egg. Gently dig up the potatoes with your hands or a small garden trowel, being careful not to damage the tubers.
Once harvested, allow the potatoes to dry and cure in a cool, dark place for about two weeks. This helps toughen up their skin and improve their storability. After curing, you can enjoy your homegrown potatoes in all sorts of delicious recipes!
Step 6: Storing Potatoes
Store potatoes in a cool, dark, and well-ventilated space to prevent sprouting and spoilage. Avoid storing them near onions or apples, as these can accelerate sprouting. Check stored potatoes regularly for signs of rot or decay and remove any damaged tubers.
Benefits of Growing Potatoes in a Cardboard Box
Growing potatoes in a cardboard box offers several advantages. It’s a sustainable and eco-friendly gardening method that repurposes waste materials. Additionally, it’s a space-saving option for those with limited outdoor space or no access to a traditional garden plot.
Potential Challenges and Solutions
While growing potatoes in a cardboard box is relatively straightforward, there are some common challenges to be aware of. Overwatering, poor drainage, and overcrowding can lead to issues such as rot and disease. Monitor your plants regularly and adjust your care routine as needed to ensure healthy growth.
Creative Uses for Cardboard Boxes in Gardening
Beyond potatoes, cardboard boxes can be used for a variety of other gardening projects. You can use them to start seeds, create raised beds, or even build compost bins. Get creative and explore different ways to repurpose cardboard in your garden.
Environmental Impact of Container Gardening
Container gardening, including growing potatoes in cardboard boxes, has a lower environmental impact than traditional gardening methods. By using recycled materials and minimizing water usage, you can reduce your carbon footprint and contribute to a more sustainable future.
Tips for Growing Potatoes in a Cardboard Box
- Choose the right variety: Some potato varieties are better suited for container growing than others. Look for compact or determinate varieties that produce smaller plants and are well-suited for confined spaces.
- Keep an eye on pests and diseases: While growing potatoes in a cardboard box can help reduce the risk of soil-borne diseases, it’s still important to monitor your plants for any signs of pests or issues. Look out for common potato pests like aphids, potato beetles, and fungal diseases.
- Rotate your crops: To prevent soil depletion and disease buildup, it’s best to rotate your potato crops every year. After harvesting your potatoes, consider using the spent soil in your cardboard box for other vegetables and starting fresh with new soil for your next potato crop.
Conclusion
Growing potatoes in a cardboard box is an easy and rewarding way to enjoy homegrown produce, even with limited space or experience.
With just a few simple materials and some tender care, you can harvest a bountiful crop of delicious potatoes right from your own backyard or balcony.
So why not give it a try?
Happy gardening!